1. Preparation Before Scanning
Before starting, users need to take a few preparatory steps:
- Check the connection: Ensure that the photocopier is connected to the same local network (LAN) as the computer. This allows the computer and photocopier to communicate with each other.
- Install necessary drivers and software: Some photocopiers require the installation of drivers or supporting software on the computer to receive and process scanned files.
- Identify the photocopier’s IP address: The IP address allows access to the photocopier from the computer. It is usually found in the network settings of the photocopier.
2. How to Scan Documents from a Photocopier to a Computer
Below is a basic guide on how to scan documents from a photocopier to a computer:
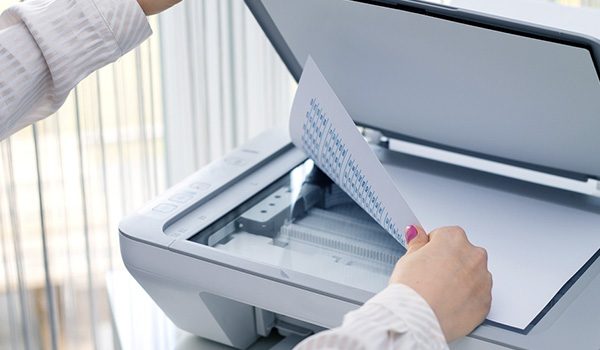
Step 1: Place the Document for Scanning
- Using the Automatic Document Feeder (ADF): If scanning multiple pages, place them in the ADF tray. Ensure the pages are neatly aligned and not folded.
- Using the Flatbed Scanner: For single or important documents, place them directly on the scanner glass to ensure the best image quality.
Step 2: Configure Scan Settings on the Photocopier
- Select the scanning mode: On the photocopier’s control panel, choose the “Scanner” or “Scan” function.
- Choose file format: Select the desired file format, such as PDF, JPEG, or TIFF.
- Resolution (DPI): Typically, 300 DPI is sufficient for text documents. However, if higher quality is needed, 600 DPI or more can be selected.
- Color settings: Choose “Black & White” for standard text documents and “Color” for documents containing images or colored text.

Step 3: Select the File Storage Method
There are several ways to store the scanned file:
- Send to Email: The photocopier will send the scanned file directly to a specified email address.
- Save to a Shared Folder (SMB): The scanned file will be saved in a shared folder on the local network. To use this function, the user needs to:
- Create a shared folder on the computer and grant access permissions to the photocopier.
- Enter the computer’s IP address and the shared folder path in the photocopier’s settings.
- Save to USB: If the photocopier supports it, users can save the scanned file directly to a USB drive.
Step 4: Perform the Scanning
Once all settings are configured, press the “Start” or “Scan” button to begin the scanning process. The photocopier will scan the document and store it according to the selected method.
Step 5: Access and Check the Scanned File on the Computer
- Shared Folder: Open the shared folder on the computer to view and manage the scanned file.
- Email: Access the inbox to download the scanned document.
- USB Drive: Connect the USB to the computer and open the saved file.
3. Benefits of Document Scanning
According to a report by the Association for Intelligent Information Management (AIIM), companies that implement office digitization save an average of $30,000 per year on paper, printing costs, and an additional $120,000 on downtime costs. This highlights the importance of converting paper documents into digital format for efficient information management and protection.
4. Important Notes When Scanning Documents
- Ensure documents are clean and flat: Avoid dust or creases on the document to achieve the best scan quality.
- Check paper size: Set the correct paper size in the settings to prevent cropping or distortion.
- Name files clearly: Helps with easy searching and management later.
Scanning documents from a photocopier to a computer not only improves information storage and management efficiency but also contributes to environmental protection by reducing paper usage. Hopefully, this guide helps users scan documents easily and effectively.
———————————————–
👉 For more details, please contact:
📞 Hotline: 02866609898
🏢 Head Office: 72 Lê Thánh Tôn, Bến Nghé Ward, District 1, Ho Chi Minh City.
🌐 Website: https://printsolution.vn/home_vn/